
Japanese Hand Saw Information Translation
This is the speech of Mr. Tsuchida Noboru at the seminar held by Shinshu Woodworking Association in Matsumoto City, Nagano Prefecture on December 1, 2021.
Original Japanese document: 「木工研究会手打ち鋸講習会」
Information website shared by the Shinshu Woodworking Association: http://www.mokkou.org/kai_in/kenkyu.html
Since this is public information, I have translated it for learning purposes. I have tried to stick to the original text, but there are also omissions and modifications, as well as added pictures and some external links to make it easier to understand. If there are any inaccuracies or unclear parts in the translation, please leave a message.
Saw - a despised tool
Tsuchida: Due to the global outbreak of the COVID-19 pandemic, it has become difficult for me to continue operating my shop in the form of face-to-face communication. During this period, I have received adjustments and sharpening for tools such as saws from all over the country.
It's not related to saws, but I've been getting a lot of requests to sharpen kitchen knives. This is because more people are cooking at home due to the coronavirus pandemic, and restaurants are sending out their knives to be sharpened during their closures.
The number of customers in the store has decreased, so I have been able to read a lot of books during this time.
Among them is the 「幕末明治新聞全集/Complete Collection of Bakumatsu and Meiji News」 published in the Showa era. The content is mainly composed of articles by foreign authors, recording the social, cultural and folk customs of Japan from the end of the Bakumatsu to the Meiji period.
There was an account of how using a hand saw was much less productive than using a circular saw. I think that from that time on, hand saws in Japan were destined to be eliminated.
To do a good job, you need a good tool - a good saw.
Next, I will talk about the sculptor Takamura Kōun.
Because I have been engaged in the research and collection of tools made by Chiyotsuru Korehide (1874-1957), during the investigation of tools I learned that there was a sculptor named Asakura Fumio (1883-1964) who had a lot of contacts with Chiyotsuru Korehide. It was also from Asakura Fumio that I learned about a sculptor named Takamura Kōun (1852-1934).
Takamura Kōun has an interesting book called「光雲懐古談/Nostalgic Tales of Takamura Koun」, which mentions the production process of the work "Old Monkey", and records how he used a chisel to remove large pieces of wood. However, I have doubts about the process of using a chisel to remove large pieces of wood.
Comparing the size of the material described with the size of the finished work, it is obvious that the unnecessary parts were marked with ink and roughly cut off with a saw, but the process where a saw would have been used has been omitted in this book.
This brings me to the idea that saws are despised tools.
No saw was found among Asakura Fumio's remaining tools.
Although Chiyotsuru Korehide made many exquisite chisels, planes and knives throughout his life, he did not make saws because the production method was completely different from the above tools. However, because Chiyotsuru Korehide could not make saws himself, he collected many excellent hand-made saws.
Considering the special relationship between Asakura Fumio and Chiyotsuru Korehide, I think he must have had some nice saws. I later found a beautiful saw in an old photo of his tools, but the real thing has not survived.
Another modern Japanese sculptor, Hirakushi Denchū(1872~1979), who is as famous as Asakura Fumio and Takamura Kōun, also used a famous saw of about 60 cm from the Aizu area of Japan in his work. Unfortunately, the actual saw has not been preserved either.
———————————————————————————————————
The saw that Kobiki artisan (Japanese sawyer) uses is called a Maebiki - Ooga.
 1: "A famous blockprint by Hokusai titled “Mount Fuji Seen from the Mountains of Totomi,” showing a crew of sawyers rip-sawing a timber into boards using maebiki ooga saws, one man on top and one underneath. Notice a third man to the left sitting under the timber sharpening another saw, perhaps his own or that of the fellow sitting in the background. A woman, probably the loving wife of the saw sharpener, has a baby wiggling around on her back trying to get a better view. She is no doubt waiting for her husband to pause his file work so she can deliver his lunch contained in the traditional furoshiki cloth depicted in her left hand. Some things never change with time or place, so she probably isn’t standing there silently, but I will leave the subject of the one-sided conversation to Gentle Reader’s effulgent imagination. " —— Covingtonandsons, 「Japanese Handsaws: The Maebiki Ooga 前挽大鋸」
The Ooga was not a one-person saw, but a large frame saw that saws the material by two people.

2: A scene of two sawyers using Ooga in an old Japanese picture book from the Muromachi period. This picture book is called『三十二番職人歌合』(Sanju ni ban shokunin utaawase) , it was compiled in the Japanese Middle Ages (12th century–16th century).
The importance of a saw's blade lies in its ability to stay straight while sawing; if the saw's blade is not straight, then the cut will not be straight.
The Ooga was made with a frame and tension was applied to keep it straight, but although it was suitable for cutting large pieces of wood, it was not very maneuverable, so a saw that was half the length of the Ooga was invented.
This saw, which is only half the length of the common Ooga saw, may be the predecessor of the Maebiki - Ooga. In the past, Japanese blacksmiths used Tamahagonly only near the cutting edge of the blade, and used inferior iron everywhere else. In this way, the blacksmith only needs to attach a piece of iron plate (large size) above the short Ooga saw blade to maintain the straight line during the sawing process.
 3:「Cutting boards from thick lumber」,『Picture for Children Depicting Occupations Concerned with Clothing, Food and Housing』by Utagawa Kuniteru Ⅱ in 1873. This painting depicts sawyers using Mabiki Ooga to saw boards from lumber. It can be seen that the saw body is black and the saw blade is silver (Tamahaganel).This confirms the characteristics of the large saw mentioned above.
The Maebiki - Ooga uses heated iron pliers to clamp the saw teeth and heat them one by one to complete the quenching process.
If a tooth on a Maebiki - Ooga is crooked, it is usually sufficient to use a tool like a Dainaoshi kanna or scraper to thin out the crooked tooth.
Unlike the Maebiki - Ooga, common saws have the entire blade hardened.
It can be said that this feature of the lMaebiki - Ooga led craftsmen of that era to consider the saw as an unfinished tool, this may have been one of the reasons why no saws remain among sculptors' tools.
You might wonder why the sawsmith doesn't just harden the entire Maebiki - oga? This is not an easy task.
When the chisel and plane are hardened (water-cooled), because of the laminated structure of a certain thickness, the soft iron can buffer and absorb the stress generated by the steel during cooling, and the steel is less likely to crack during cooling.
However, Japanese saws are inherently thin, and they are not laminated. If water-cooling hardening is used like chisels and planes, the probability of the saw blade deforming and cracking would be very high.
The blade of a Japanese sword is also made entirely of Tamahagane, but is hardened only on the cutting edge side.
In addition, Tamahagane steel used for swords has uneven carbon content, so to make a sword it is rolled out thinly and folded over forged to even out the carbon content, which can also effectively prevent cracks during hardening.
In the past, skilled sawsmiths would fold and forge the saw blade repeatedly (less often than forging a sword) like Japanese swordsmiths to obtain a saw blade with a relatively uniform carbide, and then use a gentler method to harden it. Although these saw has a high carbon content, the metal structure is good, and it can be regarded as an excellent fully hardened saw under the technical conditions of the time.
The method of using oil for cooling, which was developed in Aizu at the end of the Edo period. This method slowed the hardening process slightly, resulting in a lower-hardness steel (not hard enough for chisels or planes), but it was perfect for saws, so the method spread across the country.
I have seen some older saws that predate the advent of oil quenching, which are very soft throughout and have blades that bend easily when sawing.
By the way, the origin of the saw forging technology in the Aizu area comes from the Osaka area, which was also the distribution center of high-quality Tamahagane in Japan at that time. Perhaps after the industry moved to the remote Aizu area, the blacksmiths and their descendants who moved from the Osaka area to the Aizu area found it difficult to obtain high-quality sawn materials, so they had to find another way to improve the sawing technology, and thus the oil quenching technology came into being.
The carbon content of steel is about 0.6% for Japanese saws, 0.7% or 0.8% for Japanese swords, and 1% to 1.2% for Japanese planes and chisels.
When steel is hardened in the same way, the one with a higher carbon content will be harder.
Iwasaki Kosuke, a smith(also a metallurgist) of Japanese razors, explained that the carbon in steel is like pebbles in concrete when magnified, and that it is stronger when it is more uniform than when it is uneven or has different sizes.
The Zet saw (modern factory-made saw) has a carbon content of 0.8%. Since only the teeth are hardened, some people say that it is the descendant of the Maebiki - oga. By the way, the hardness of Zet saw teeth is much higher than that of hand-made saw teeth.
 4: The Zet saw teeth are hardened only at the tip.
If the entire Zet saw blade is hardened to the hardness of the teeth, the blade can be easily broken by hand.
Why develop this kind of high-hardness saw with replaceable blades and high frequency heat treatment to harden the teeth? In addition to saving a lot of time on sharpening teeth, it is also for better and faster processing of new materials such as various multi-layer boards and plywood with high-hardness adhesives in addition to pure wood.
Zet saws were developed in Miki area for 10 years and have spread to all parts of Japan. It has also dealt a heavy blow to the craftsmen who sharpen the teeth and adjust the saw blades (called Metateya in Japan).
From the Metateya’s perspective, the hardening of the Zet Saw makes it too hard to sharpen with a file, which means the blade can only be replaced.
Because my tool shop also does “Metateya” work, after the Zet saw appeared, some hand saw blacksmiths also tried to increase the hardness of the saw. My shop also received some of these saws. Because ordinary files have low hardness, only diamond files can be used to sharpen the teeth of these high-hardness hand saws.
This kind of hand-made saw with a relatively high hardness is easy to break, especially some special saws that handle groove cutting and some special saws that need to saw curves. There are still some hand-made saws with a relatively high hardness in stock, but I generally don’t sell them.
Nowadays, work content is diversified and segmented. If we can use the right tools for the right place, it will definitely help us complete our work better.
By the way, the factory that makes Zet saws also uses diamond files to sharpen the teeth.
———————————————————————————————————
Well then, I’d like to talk about the structure of the traditional saws that you all use.
Nowadays, double-edged saws are common, but in the past there were only single-edged saws.
The double-edged saw appeared in the late Meiji era (early 20th century). By setting the teeth to form a perfect saw path, the saw with teeth on both sides can cut deep into the wood without getting stuck.
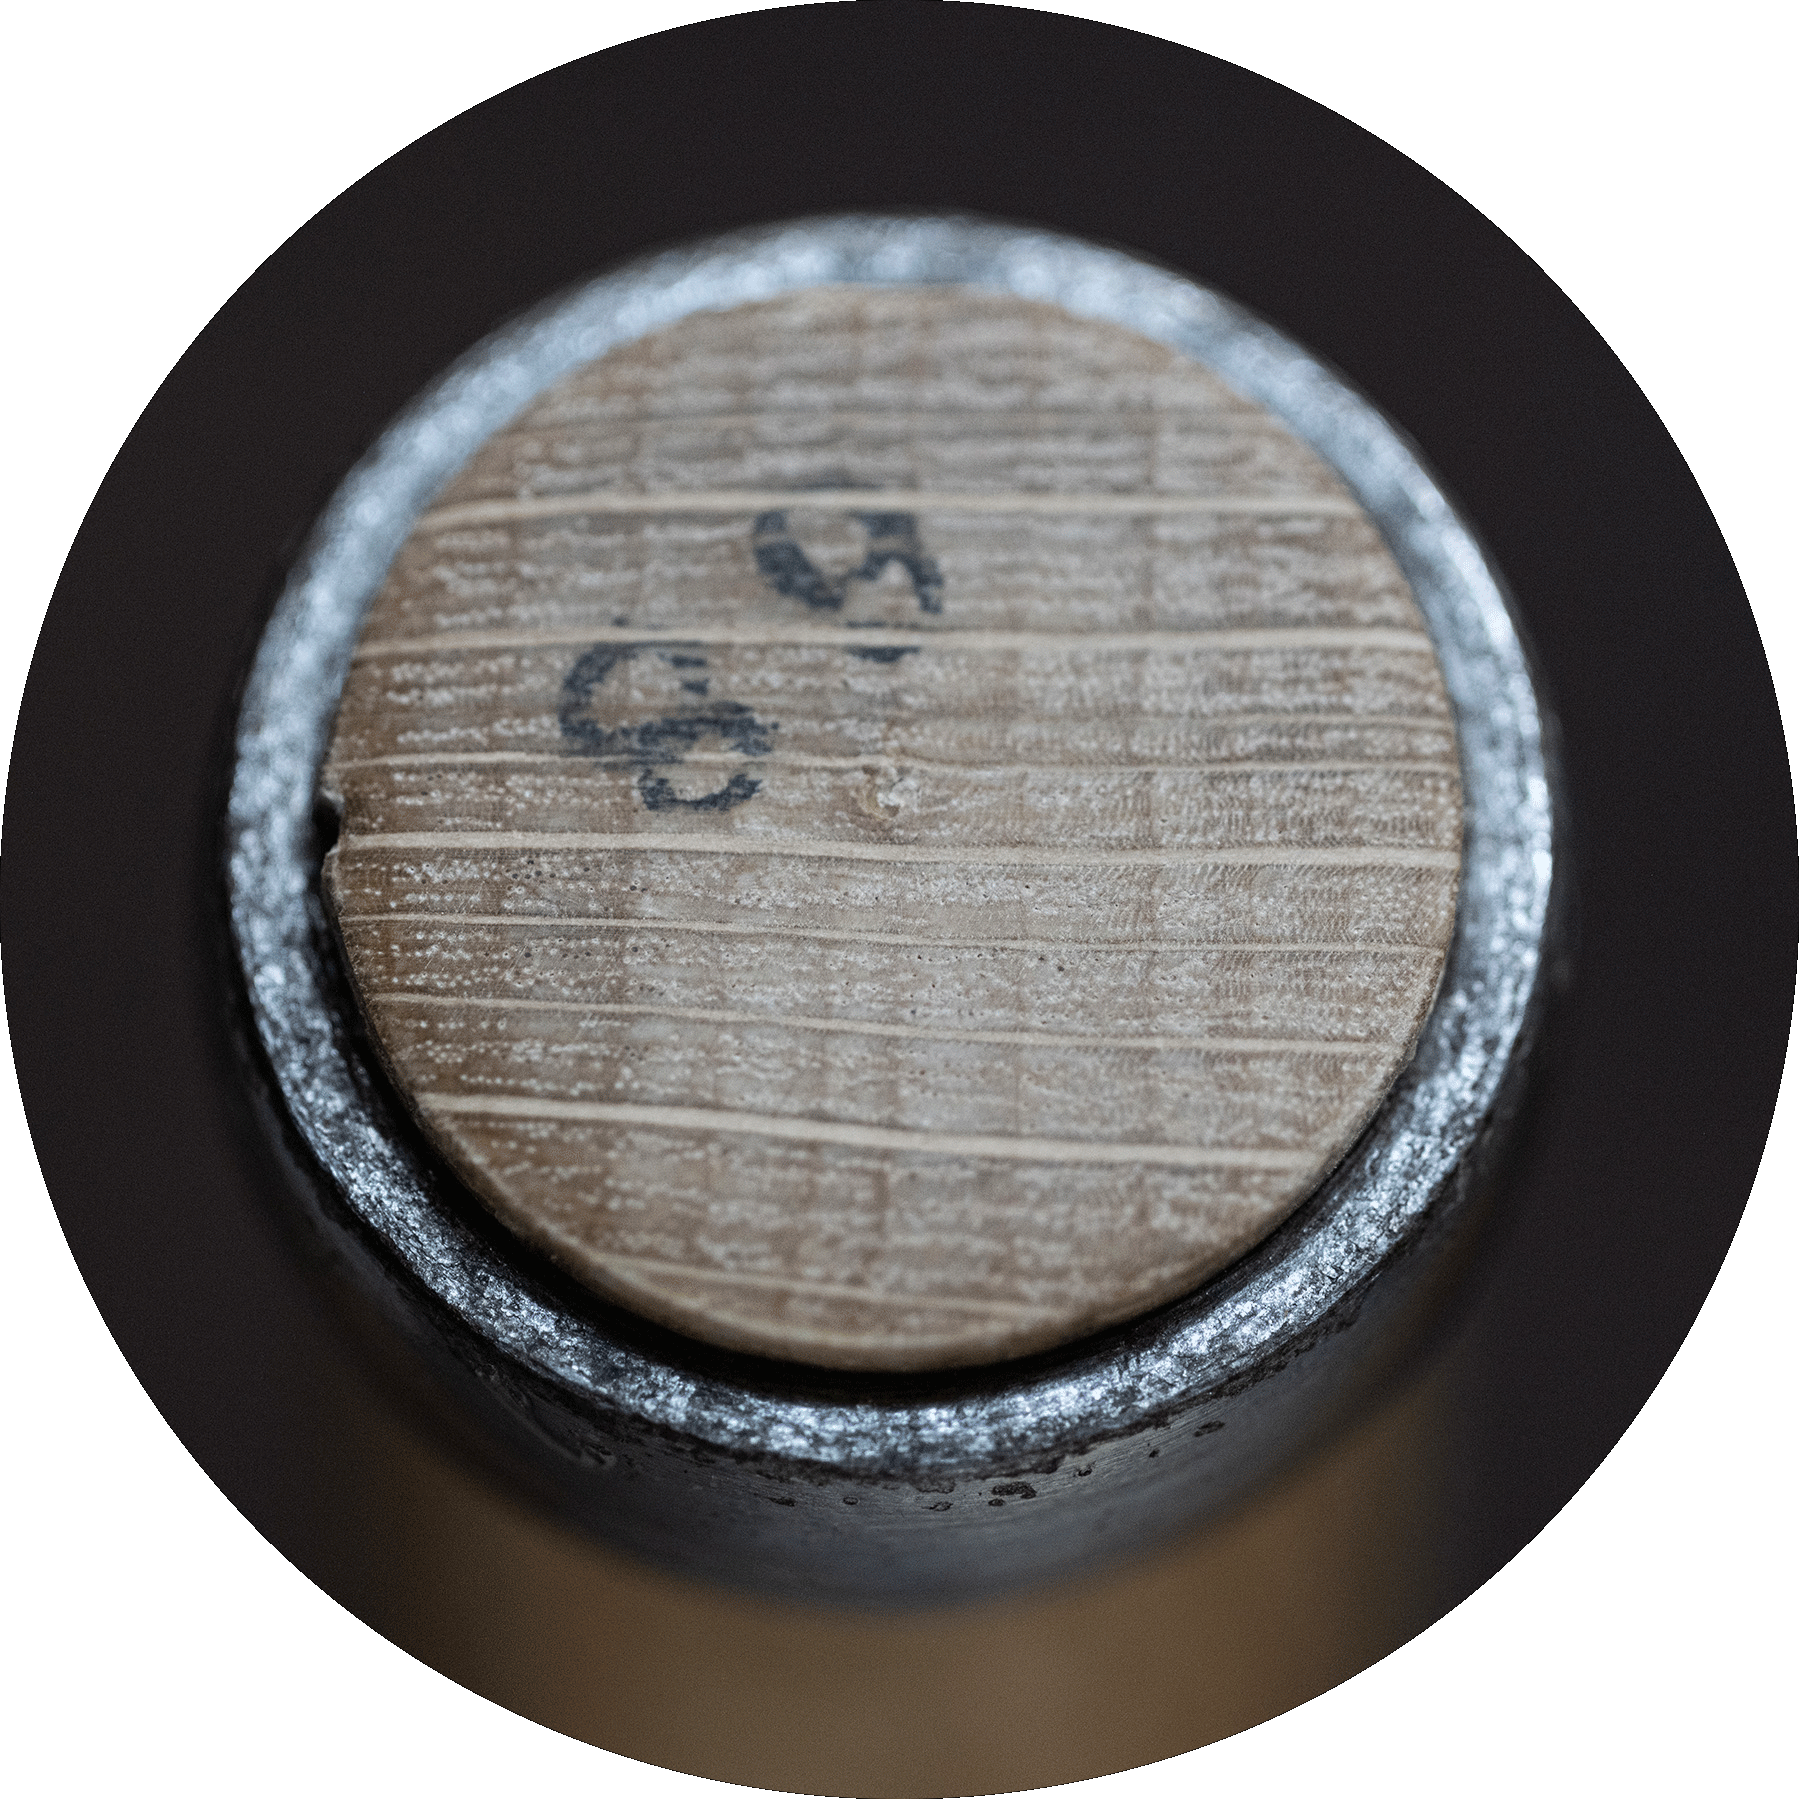
When I started learning how to adjust and sharpen saws, my father asked me to visit some sawsmiths in the Sanjo area. One of them was Oba Shoichiro, who worked with his family (three people in total) and made eight hand-made saws a month, which were sold for 40,000 to 50,000 yen at the time.


5: The double-edged saw made by Oba Shoichiro and the mark he used.
He told me that although a double-edged saw is easier to saw straight than a single-edged saw, it is more difficult to make a double-edged saw not get stuck during sawing than a single-edged saw.
※ My understanding is for reference: This is because a single-edged saw has teeth on one side, and the saw path width is greater than the thickness of the saw body, so the cutting is smooth and not easy to get stuck, but the saw body is prone to offset during the sawing process; a double-edged saw has teeth on both sides, and the saw tooth set on the other side stabilizes the saw body during the sawing process.The reason why Japanese Tateguya carpenters (mainly engaged in the production of wooden doors and windows) began to use double-edged saws was because they needed to use a rip saw and a cross-cut saw to make tenons, which brought great inconvenience to the work. When my father took over the work in around 1935, more and more carpenters began to use two-edged saws.
 6: A set of saws, including crosscut and rip cuts.
No matter it is a double-edged or single-edged saw, although the teeth appear tight and tough, the steel in the middle of the saw blade is actually relatively loose. The industry has an anthropomorphic name for this treatment, called “腰を抜く”.
※ 腰を抜く: It means that a person loses strength in the waist and is unable to stand.
If the center is loose, the surrounding area is tense, but as you become more familiar with the saw blade, you will be able to tell which areas are tense and which areas are loose.
When repairing saw blades, use a special hammer to hit the tight parts to balance the tension, but if you hit the loose parts, they will become looser.
Achieving that balance is much more difficult than sharpening the saw teeth with a file.
 7: Hammer marks left on saw blades.
When I was new to the job, I asked Oba Shoichiro how to tell the difference between loose and tight parts of a saw blade, and he immediately replied, "If you can figure that out, you can become a saw smith.”
Why are Japanese saw blades designed this way? Because when sawing the board, the friction between the wood and the saw blade is heated, causing the metal to expand due to the heat.
We don't hear about it much these days, but there have been news reports of train tracks expanding and bending due to the heat in midsummer, making them impassable.
Even the saw blade, the part of the blade closest to the cutting edge heats up and stretches, If the rest of the saw blade remains the same, without any process to absorb or cushion the expansion caused by heat, saw blade will bend, making it impossible to maintain saw blade important straightness.
However, if the center of the saw board is loose, even if the edges of the saw board expand due to heat, it will absorb the expansion. This is actually the theory behind the Japanese saw blade.
When you are using a saw and it gets bent, you try to straighten it on the anvil, but even if you hit the bending part by hammer, it won't go back to the way it was.
The bent part of the saw blade has expanded and stretched, if you hit it, it will stretch even more. I also hit the bending part when repaired it, but need to find out where it is stretched and where there is tension, and release that tension in the surrounding area, otherwise it won't be fixed.
If you just hit saw blade without knowing what to do, it will stretch in various places and become soft and floppy.
I learned this from mistakes when I was younger, but it's probably a good idea to remember that a saw cannot be fixed simply by hitting it.
A good saw has very precise and well-constructed tension and relaxation points.
If you only use a saw with replaceable blades, you won't have to deal with the problems I mentioned above.
Okada Metal Industry, which developed and manufactured the Zet saw, purchased a large amount of high-purity white steel (a type of carbon steel) with few impurities specially made for saws from Hitachi Metals Yasuki Manufacturing Co., Ltd. as a production raw material, and its inventory was so large that it was jokingly called "Big Hitachi”.
Perhaps it is the high-frequency quenching process that hardens the teeth, which makes the Zet saw have strong cutting ability. However, due to the industrial production of saw blades, it doesn't go as far as a skilled blacksmith would, who creates an exquisite balance of tension and slack. For this reason, the Zet saw's sawing path is wider than that of hand made saw, but it's very precise and no one can do it that accurately by hand. The cut is good, but I think the cut is a little rough.
Since the “Asari(set teeth)” of the teeth is done a lot, I am not sure whether the saw board plays a stabilizing role during the sawing process.
※ "Asari" is done a lot, which means the saw path is wide. When the thickness of the saw blade is smaller than the width of the saw path, the saw blade is easy to deflect.
If you look closely at the Zet saw blade, you will see some marks left by mechanical impact, indicating that the Zet saw has not completely abandoned the design of the tightness distribution of the saw blade, and the metal in the middle part is also relatively loose.
This also helps when we adjust the blade of the band saw. No matter how much tension we put on the blade, we must remember that the metal on the side close to the teeth will expand and stretch during the sawing process.
In terms of ease of use, I think a single-edged saw is more ideal than a double-edged saw. The concave-spine rip saw and the convex-spine cross-cut saw are very easy to use. My late grandfather always said that highly skilled sawsmith could make cross and rip saws with spines that fit together perfectly.
 8: A set of cross-cut(below) and rip-cut(above) saws with perfectly aligned spine by Third Generation Nakaya Takijiro.
I think this is basic design common sense for sawsmith, but the master sawsmith, the second generation Miyano Tetsunosuke didn't know how much to curve and bend, but when he coming to our shop, we would show him old saws from Tokyo, Aizu, etc., and he carefully observed how bends and curvatures matched and applied them to his work.
By the way, the above-mentioned treatment of the spines curve of the rip and cross-cut saws has basically no effect on the performance. However, for a set of tools, this treatment gives it a conscious sense of beauty ( ※ symmetrical beauty, complementary beauty). Although it sounds a bit like a "legend", users also prefer tools that are both beautiful and practical.
If you work with solid wood most of the time, you will definitely feel the difference when sawing with a single blade saw.
In addition to the saws of famous sawsmiths (Miyano Tetsunosuke, Yamaguchi Keizaemon, Oba Shoichiro), there are a large number of second-hand saws and unused saws in the online market. Saws that used to sell for 30,000 yen may now only cost 3,000 yen. The cost-effectiveness is very high. If you are interested, you can try it. Good quality chisels and planes have become expensive, but saws are cheap.
———————————————————————————————————
Next, let’s talk about the size of the Japanese saw.
The commonly used size of Japanese smoothing plane is called “寸8“(54mm), and it is marked as 70mm when sold,70mm refers to the width of the blade of the plane. But strangely, no matter where you measure the blade, you can't find the width of “寸8“(54mm).
※ "寸8" is the abbreviation of “1寸8分”,“1分” is equal to 3mm, and “1寸” is equal to 30mm.
In the case of chisels, the slightly narrower blade width is called “3分“(about 9mm)so that it can carve a 3mm hole, so it doesn't feel strange at all. It is understandable that the actual size is smaller than the marked size. For example, for a “3分“ (9mm) chisel, in order to obtain a mortise hole size of exactly 9mm after processing, the width of the chisel will be slightly smaller than 9mm.
The size of the plane becomes a little complicated. If the blade size is over “3寸“ (90mm), the width of the blade is equal to the marked size. The same applies to small planes or mini planes.
If you have used a Japanese plane, you should know that due to its structure, you need to remove some of the two sides of the blade tip before you can use it. That is to say, the effective cutting size is smaller than the marked size.
There is also a legend that has been passed down in my shop that the size of the “寸8“ planes from the Tokugawa to the early Meiji era (approximately 1603-1870) was actually only about the size of the current “寸6“ planes.
It is said that the reason why it is called the “寸8“ Plane is that if you can produce “寸8“ (54mm) shavings with the “寸8“ Plane, you are considered capable. Even if you use a “1寸9分5厘” (58.5mm) effective cutting size plane, it is still quite difficult to produce “寸8“ (54mm) shavings. I think this may be the basis for naming the plane size.
Hira kanna (Japanese smoothing plane) is an essential tool for finishing planes in construction and furniture carpentry. Rather than using the actual width of the plane blade, it is better to name it using the actual cutting size. I think this is one of the important reasons for naming plane sizes.
In today's trade, the “寸8“ of Hira kanna is marked as 70mm, the “寸6“ is is marked as 65mm, and the “寸4“ is is marked as 60mm.
A “1分” difference would be 3 mm, and a “2分” difference would be 6 mm, but they did it in increments of 5 mm, which could be seen as being casual, or as a way to make business easier.
Even the names of the parts of a plane are different from what's written in books and what my father and grandfather used.
The part of a Japanese plane blade called “Ura” is actually on the front side of the blade.
※ The front and back sides in Japanese are called “omote/表 and ura/裏 “.
This is very strange, there is "Ura" on the front part of the blade. Is the blade marking on the back(Ura) of the blade instead of the front?
Actually, the "ura" in the "urasuki" part of the plane blade does not mean back side, but the "Ura" here means “bay”.
※ The Japanese pronunciation of bay is “ura/浦"
From the picture below, we can see that the area "Ura" where the plane blade is sharpened is very similar to the bay terrain.

 9:The Japanese word for bay terrain is "Ura". The sharpened part of the plane blade is called "Ura" (the white part in the picture above); the dark part is called "Urasaki".
In textbooks and in the Kezurou-kai, the term "表なじみ" is used, with this side being referred to as the front, but plane body artisans Mr. Ito called it the “背中” .
※ “背中” means the back of the human body in Japanese.
※ “表なじみ” refers to the state in which the plane blade and wooden base surface are in close contact with each other and adjusted so that the tip of the blade can smoothly cut wood.
In addition, the marked side of the blade is not called "表·omote", but “面”, means face. Other anthropomorphic names referring to parts of the plane blade include "頭·head”, "肩·shoulder" and “耳·ear”.
Although the author asked the smith who made the plane when writing the textbook, because "裏" and "浦" have the same pronunciation, the craftsman answered that this side is "Ura", and the author naturally assumed that the other side is “表·Omote, front side”.
Let's get back to the point. Everyone here should know what the size of the best-selling saw of the Zet saw brand is, right?
Yes, it is a “9寸“(270mm) single-edged crosscut saw. Although it is called “9寸“(270mm), it is actually shorter, only 265mm. Handmade saws are even shorter, a “9寸“ saw is actually only ”8寸“(240mm) long.
One explanation is when cutting with a saw, the cut is not measured by the length of the blade, but rather up to the saw’s neck, so the length marked on a hand saw includes the length of the neck of the saw blade.
It may be hard to understand as a product, but it may seem more natural for the user.
The 「光雲懐古談·Nostalgic Tales of Takamura Koun」 I mentioned at the beginning has been republished many times.
Reading it, I feel there is a bit of a connection to the emotional feeling I mentioned earlier.
Although countries need to modernize, measuring the world by overly uniform scientific standards leads to a flat way of thinking, where the only values remaining are front and back.
When various values are mixed together and there is a certain richness, surely the world becomes larger and bigger?
I feel that if we start rethinking the names, dimensions, and structure of saws and woodworking tools from that perspective, we can find enjoyment in it.
———————————————————————————————————
Next is the dialogue session
Questioner 1: When did Japanese hand saws differentiate into specialized cross-cut saws and rip-cut saws?
Tsuchida: I don't know the exact era. But I think the “Edome” used in crosscut saws now is a more advanced design. It is said that the “Edome” originated from “Ibarame”, but the exact era is unknown.

10:Edo-me & Ibara -me
Questioner 1: Some books often say that rip cut saws did not exist in ancient times, but this is based on the assumption that rip cut and cross cut saws were separate.However,I think that saws before this differentiation were used to cut rip as well as cross.
Tsuchida: In ancient times, wedges were used to split wood. Not only wedges, I think there were also saw-like tools for rip cutting. Looking at the five-story pagoda of Gangoji Temple from the Nara period, I think there were quite a number of woodworking tools that were not much different from those used today.
I don't think it could have been done with a Yari ganna and Axe or Adze, there is also some academic evidence.
If you look at the Japanese armrest and saddles in the Shosoin collection, I think the woodworking tools of the time were very similar to what we see today.
Questioner 2: What tools are used to process the raw materials for the Shosoin's Red Lacquered Zelkova Cabinet?
Questioner 1: According to relevant books, the material was split using a wedge-like tool. This is also what Kennosuke Hayakawa wrote in his book.
Questioner 2: I would like to hear your opinion
Questioner 1: I took it for granted that it was cut with a saw. There are indeed some traces of sawing on the Shosoin's Red Lacquered Zelkova Cabinet. The work can be done by making some teeth on the metal sheet. Isn't it said that Egypt has been using saws since 4000 BC? After thousands of years, it can't be said that Japan has no influence at all, right?
I had the opportunity to touch the black persimmon saddle from Shosoin that I mentioned earlier, and the skin was incredibly smooth, having been finished with a kind of tool with sharp blade.
That was probably made in Japan, so that kind of tool with sharp blade did exist.
The theory that the Shosoin's Red Lacquered Zelkova Cabinet did not use a saw to make is just some scholars' armchair talk. People who only hold pens do not consider the issue comprehensively.
Some people think that there are two types of saws: rip cut saw and cross cut saw, and they think that rip cut saw can only do rip cutting, and crosscut saw can only do crosscutting. In actual work, it is not so rigid.
Tsuchida: Especially when sawing Japanese oak, we don't use crosscut saws. Whether it's felling or fine sawing(rip or crosscut), only cross cuts saw are used in either direction.
Questioner 1: The wood of Shosoin's Red Lacquered Zelkova Cabinet was probably cut using a rip saw, but a cross-cut saw may be more suitable for cutting this kind of wood with many irregular grains.
Tsuchida: Maybe it was cut with a saw with “Ibarame”, and this tooth pattern would have created a Kehiki-like effect.
※ Kehiki-like effect : The cutting principle of the Japanese crosscut saw teeth can be understood as using a Japanese 2-blade Marking Gauge "Kehiki” to crosscut the wood, except that the saw blade has many more blade "teeth" than the kehiki
By looking at what was made, we can roughly guess what kind of tools were used at that time.
Questioner 1: I talked about this issue in a lecture a few days ago. An acquaintance of mine who is studying oracle bones said that he thought these oracle bones might have been carved with such tools, and indeed, something similar was unearthed a few years later.
Because of things like this, I think that we who make things need to take a greater interest in these kinds of things and speak out more.
Tsuchida: I have collected many saws from the Edo period (1603-1868) for research purposes, but very few are in good condition. In the past, tools were used until they could no longer be used, and the thin steel plates of saws were easily corroded.
It would be great if could find the tools used to make Shosoin's Red Lacquered Zelkova Cabinet.
Questioner 1: Yes. The tools used to carve oracle bones were bronze, which is highly resistant to corrosion. Woodworking tools made of steel are too difficult to preserve.
Questioner 2: It is natural for good tools to be used up. Although there are very few woodworking tools left, Tsuchida Hamono shop and Takenaka Tool Museum still have many great collections.
Tsuchida: Considering the life of the tool itself, it is better to try to participate in its production rather than to preserve it, because it will disappear one day for various reasons. However, if it disappears, inheriting it by remaking it is probably what many craftsmen have been doing until now.
Most of the tools that have survived from ancient times are preserved in ancient documents in the form of text.
In the past, woodworking tools were constantly replaced and updated during the use of craftsmen, and very few of them have been handed down. However, after the construction of the temple was completed, some woodworking tools would be preserved in the temple.
There are many excellent woodworking tools preserved in the Tokyo area since the Edo period, but most of them were damaged and lost in the Great Kanto Earthquake and war.
Questioner 1: My family also lost a lot of tools due to earthquakes and air raids, but among the tools I brought this time was the saw my grandfather gave me, the gagari saw I used in the days when there were no band saws. The blacksmith was Yonejiro, what era was he a blacksmith in?
Tsuchida: He worked from the Meiji era to the early Showa era.
Questioner 1: I saw a few saws made by Yonejiro in the Tool Mandala series.
This saw is from the 4th or 3rd generation of Nakaya Takijiro in Kawagoe. I have had it for 40 years. 40 years ago, it was at least 1cm wider than it is now. I like it very much, and my father told me that if it is so easy to use, it might be made of Tamahagane steel. I used it a lot when I was young, But now I feel its teeth have become softer.
Tsuchida: If it is made of high-quality steel, the blacksmith will fold and forge it less frequently in order to prevent it from decarburizing during the forging process. However, this may also result in uneven distribution of carbides on the saw blade. This may be the reason why your saw's cutting feel has become soft.
Questioner 1: This double-edged saw also works well, and when I first started using it it was quite wide, but as it wore it started to feel thicker so I don’t use it much anymore.
Tsuchida: As the saw blade wears down, what was originally loose gradually becomes tense.
It's just a matter of degree, the middle of the saw blade is looser than the edges, so as the edges disappear, the loose parts will become tighter.
Questioner 1: This one by Oba Shoichiro. It's a little big and we don't use it much, but when I tried it out I was impressed with how well it cuts.
Questioner 2: Just like the saw, the hardness of a plane blade changes during initial use and after a period of use.
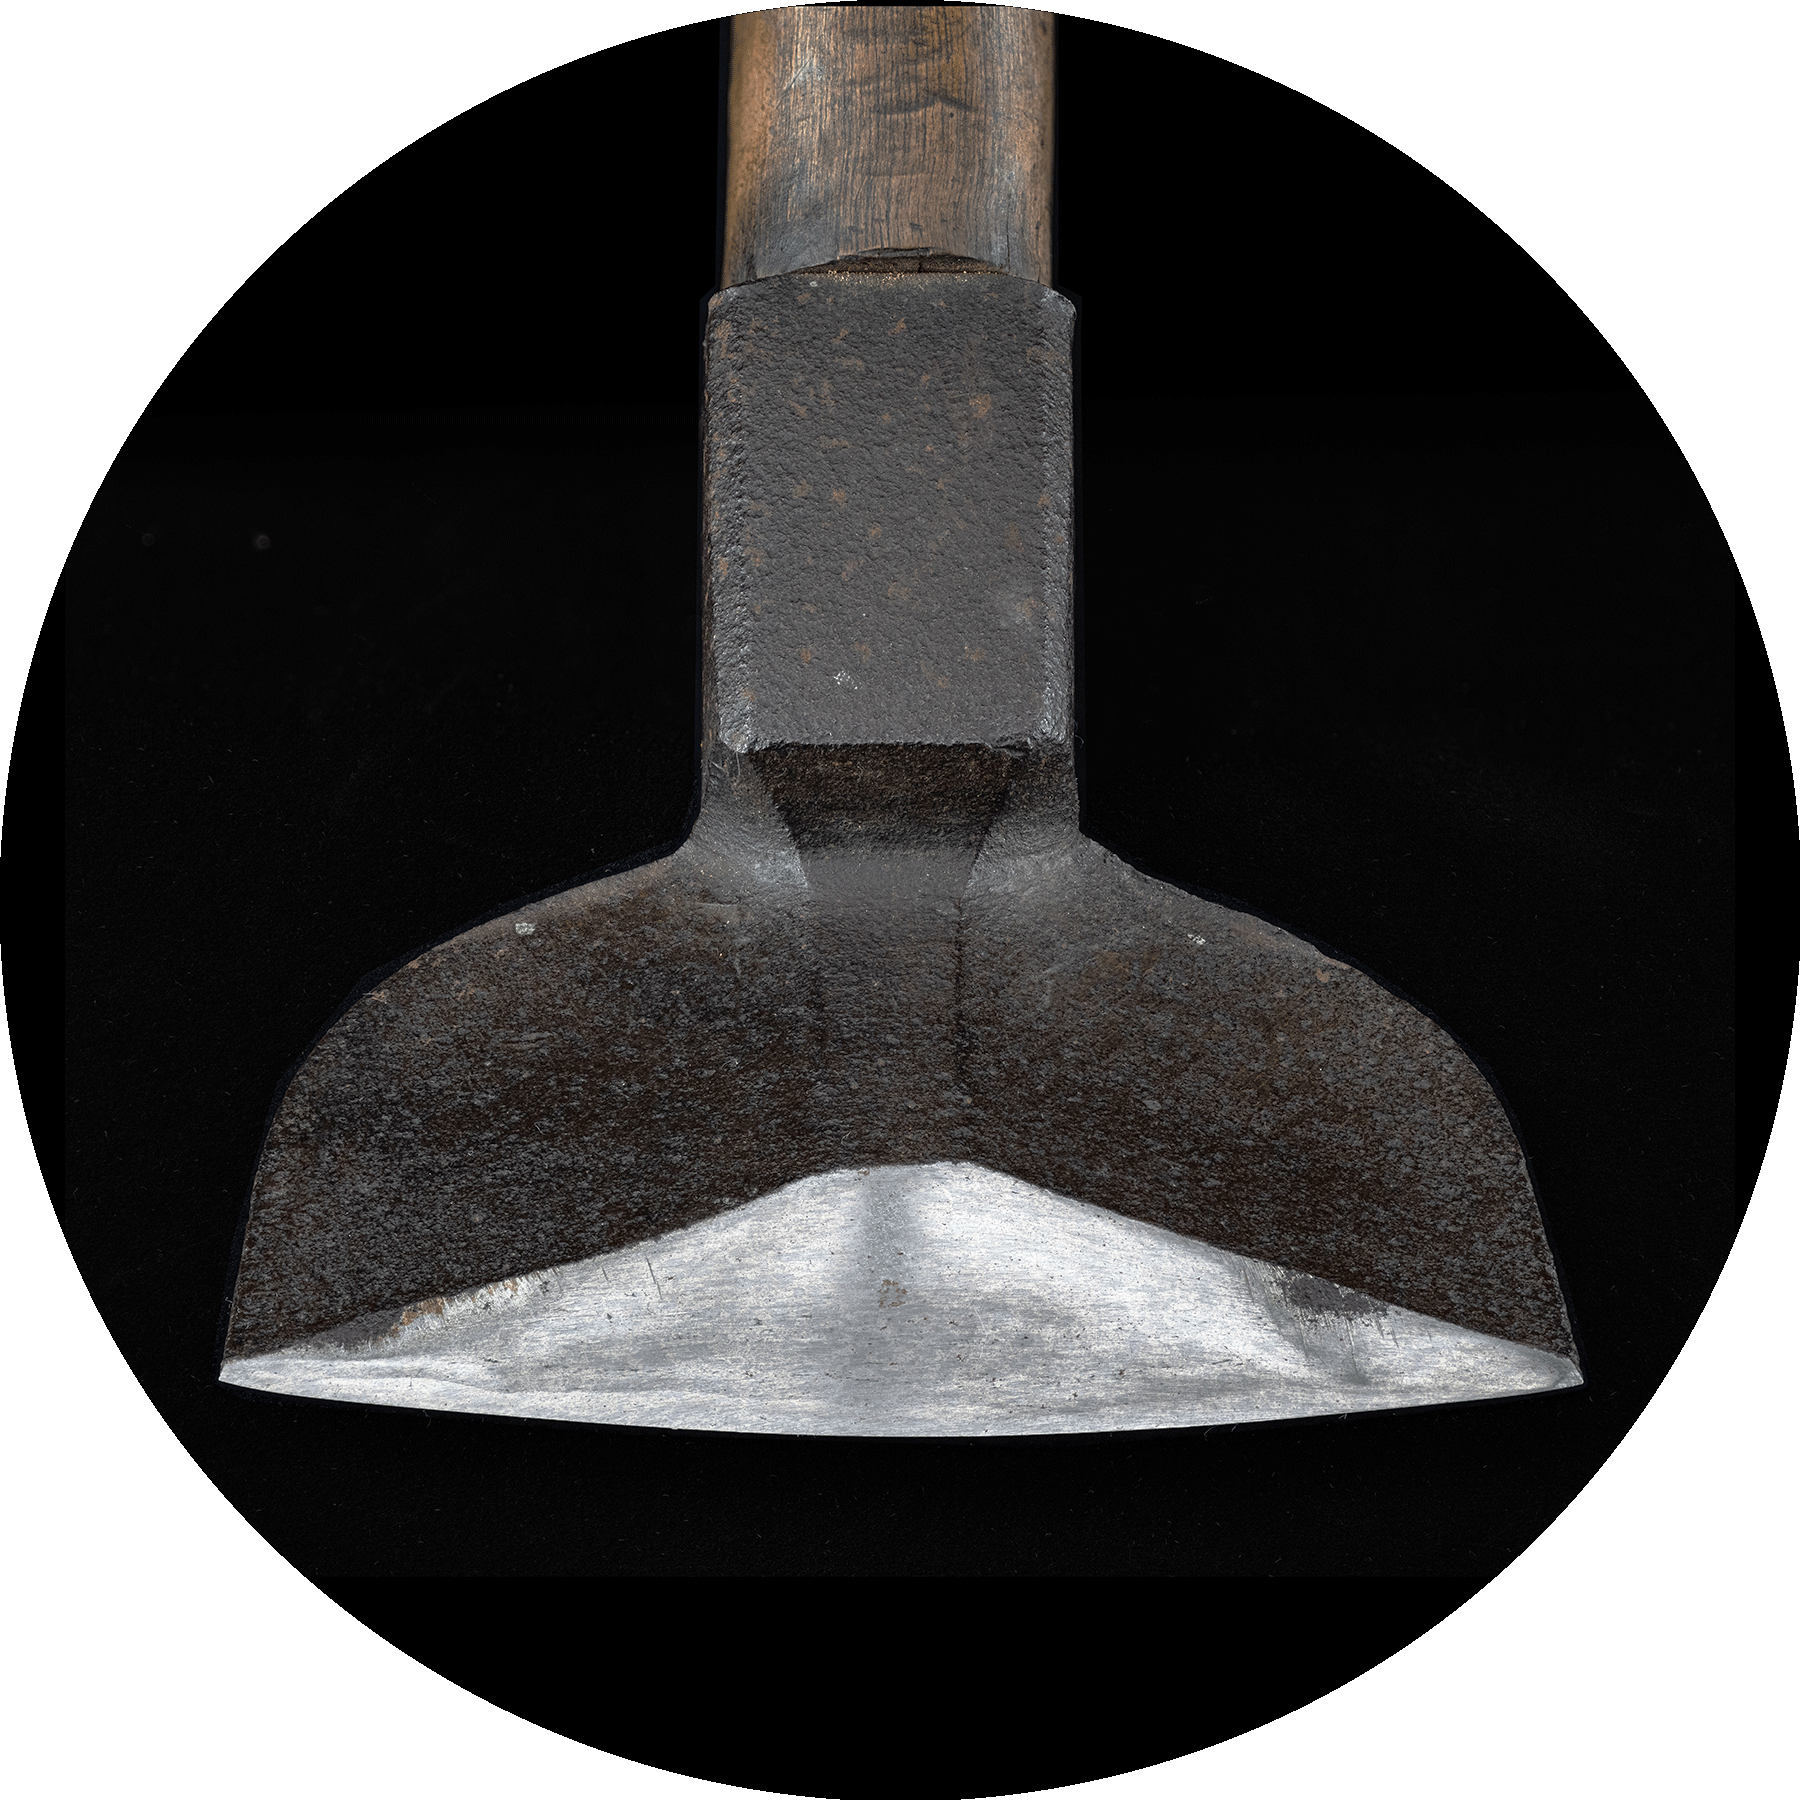
Tsuchida: Yes! In the past, some plane blades were made longer, such as “五分长,一寸长(15mm longer, 30mm longer)”.
The plane blade is generally “3寸8分” long (114mm). Why should it be longer on this basis? Because in the era without machines, after the wood was sawed or roughly leveled with an adze, it was necessary to use a rough plane to initially level it.
 11:A longer plane blade. The total length of the blade is about 120mm.
Because Japanese planes have no handles and are used by pulling back. If the blade is made longer, the blade exposed outside the body of the plane is easier to grip and exert force.
 12:The extended blade creates more gripping space behind the wood body.
When blacksmiths make tools such as plane and other laminated structures, in order to make the steel structure uniform and fine, they must avoid the blade temperature being too high or staying at high temperature for a long time.
It is then heated to 780 degrees, immersed in water, and allowed to cool (hardening process).
Whether it's a chisel or a plane, when it is heated and cooled, it is heated from the outside and cooled from the outside. The ideal state is to heat or cool the blade as a whole, which is also the ideal of blacksmiths, but it is difficult to achieve in reality.
If the blade is long, the tip is easily heated and cools down quickly. No matter what you do, the tip of the blade will easily overheat.
If the temperature is too high, the steel texture will become rough.
Therefore, carpenters in the past would use the newly bought plane for rough cutting. After using it for a period of time(the rough parts were used up) and feeling that the steel structure had become finer, they would switch to using it for medium planing or smooth planing.
That was the life of a plane in the old days.
Nowadays, we have machines so we don't have to do that, but the shortened blade were used for the blades of standing blade planes, and they worked well, and woodworking machinery is very advanced and plane are almost only used to complete the finishing process.
———————————————————————————————————
Next, let's talk about "Metate".
Whether it is a rip cut sawtooth, “Edome", or "ibarame", anyone can basically master it with hard practice.
The most difficult part is what I mentioned earlier: (板直し/Itanaoshi), repair (adjust) the saw blade.
Before adjusting the saw blade, we must carefully check where the saw blade is tense and where it is loose. If you hit the place that should not be hit, it is likely to cause irreparable damage to the saw blade.
Maintain saw blade like this. In short, balance the areas of tension and relaxation. But it's hard, if you can master it, you're a pro. As Oba Shoichiro said before.
Sharpening the saw teeth is a very fine work, and even me, now I am 60s, can no longer do it without auxiliary tools.
In fact, wearing auxiliary equipment (magnifying glasses) is more tiring than doing "metate" with naked eyes. But my eyesight has deteriorated, so I have to do this.
Considering that, it's not a good job for the healthily.
I think "metate" is a task that anyone can do. In the old days, whether they were joiners or carpenters, the "Uwame" part of the crosscut saw teeth is sharpened by themselves.
 13:The highlighted triangle in the image above is the "Uwame" part of the Edome tooth.
When the teeth are no longer sharp, use a file to grind the top of the saw teeth at a perpendicular angle to the saw body until each tooth is of uniform height and forms a new, sharper “Uwame."
But now the world is dominated by saws with replaceable saw blades.
If I adjust the saw blade of a hand-made saw and sharpen it, I can finish up to 3 saws a day. I only charge 2,000 yen for each saw, and It is difficult to maintain a store and a family on 6,000 yen a day. Even if the price is raised to 3,000 yen per saw, the saw blade of a replacement saw only costs about 500 yen, which is completely uncompetitive. There used to be many tool stores in Tokyo that engaged in hand-made saws "metate", but now most of them are closed.
We talked about a lot of things today, but it's really fun when you try it.
I think there's a way for someone who loves it to pass on this technique as a hobby, the difficulty is how this skill and experience is passed down among professional blacksmiths, professional “Metateya”.
———————————————————————————————————
Miyano Tetsunosuke
There was a master sawsmith named Miyano Tetsunosuke in Miki, Hyogo Prefecture, In addition to using modern steel, he has always insisted on using Tamahagane to make high-quality saws. After the war, my father went to meet him, and there was a wholesaler waiting in front of his workshop. My father told him, "Your saws are fine, and I'd like you to make something for me," the smith became interested and sent the wholesaler away.
When he asked my farther what he wanted, my farther replied, "I'd like you to make one with teeth about half as fine as a normal saw.”
The size of common saw teeth is about 1mm, which means that the saw teeth need to be reduced to about 0.5mm. The difficulty in making this saw is not only the later production and sharpening of the saw teeth, but the most difficult part is that when the Tamahagane is folded and forged into a saw blade, some oxide film will inevitably be mixed in during the folding process. As the saw blade is forged and extended, the area of the oxide film will also expand. The structural strength of these oxide films is very low, and the saw teeth are likely to break where the oxide film is mixed.

 14:The area marked by the red circle in the picture above has an oxide film mixed in. If this part is close to the cutting edge, the saw cannot be used.
In addition, if the saw teeth are made so small, the chip removal performance will be very poor. To improve the chip removal performance of small saw teeth, the saw blade thickness can only be made half of the normal thickness. In short, it can only be made of jade steel, and it is necessary to avoid mixing too much oxide film during folding and forging to make the saw blade thin while maintaining strength. It is very difficult and the failure rate is extremely high.
It took about a year for this saw to finally reach my father.
After this saw was completed, my father continued to ask Miyano to make a saw that was thinner than this one and had teeth half as small.
That means it has 128 teeth in 30mm length, and there are 4 teeth on a width of 1mm.
 15: The tooth size of a common "9寸/240mm" Douzuki saw By Nakata Sadagorou. There are about 30 teeth on the 30mm length of the blade.
My father replied, "I want to see how fine the teeth can be so that there will be no burrs on the workpiece after sawing.”
The saw was eventually completed, but this time the blacksmith neither made the teeth nor added metal spine to the saw blade.
My father then used a magnifying glass and a file to carefully create the tiny teeth that were difficult to distinguish from a distance. Afterwards, it was obvious that he was very satisfied with himself for completing the teeth creation and sharpening of this saw.
The metal spine would be made by the blacksmith later, so my father tried sawing it before receiving it, but it was difficult to saw it straight. However, my father found that the wood he cut had no burrs and was very clean. He was very satisfied and and continued to ask Miyano to make the same saw blade.
A frequent customer said, "People who know you understand that you are doing a good job in business, but those who don't know you probably think you are just showing off.”
If we can figure out what kind of precision a saw tooth can achieve, we'll know what saw to use for fine woodworking (like Sashimono).
You may think that it is unnecessary to go to so much trouble to make this saw, but it is not completely meaningless to challenge the limits with the saw craftsman.
In fact, we simply want to work with blacksmiths to develop better and more practical tools.
If we are lucky enough to develop tools that are loved by everyone, it will be the meaning of our existence for my father and me.
There are fewer and fewer blacksmiths in Japan now, and the number of blacksmiths making saws can be counted on one hand. The remaining blacksmiths can only work desperately. To be honest, every blacksmith on this road is often walking alone and lonely.
———————————————————————————————————
Next will enter a conversation session
Questioner 2: What can a fine-tooth saw mentioned above mainly used for?
Tsuchida: The teeth of a common hand saw are about 1 mm in size. If you use it to cut a strip of wood about 1mm x 1mm wide, the wood will easily get stuck between the teeth.
Questioner 2: I see. The saw teeth made thinner in order to cut thinner wood strips.
Tsuchida: For cutting large materials and deep cutting, it is better to use a Zetsaw Dozuki back saw.
The materials used to make "Kumiko" by "Tateguya" are very thin, so the "Douzuki" saws of "Tateguya" basically do not have a set saw path, because they only need to cut materials less than 10mm thick at most. But this kind of zero set "Douzuki" saw is easy to be damaged if it cuts deep.
Questioner 2: Mr. Questioner 1, you are a "Tateguya". Is it true that the “Douzuki”saw used to process "Kumiko" does not have a set saw path as Mr. Tsuchida said?
Questioner 1: Since it is rip cutting, I used a douzuki saw with "Ibarame" teeth.
Questioner 2: Is it because you cut from the end of the wood?
Questioner 1: No, most of the processing of "kumiko" is not cross-cutting, but bevel cutting. I usually use a saw with 1mm teeth to make tenons with a thickness of less than 9mm.
Questioner 2: In addition, there are many types of files used to sharpen saw teeth. Which type of file is mainly used for such small teeth saw?
Tsuchida: The most common is the industrial-made “摺込み鑢/Suri-komi" file,which has bevel teeth on both sides. We call this file an "inch file”.
This file is relatively rough, but because it is an industrial product, it is very accurate and is a good choice for sharpening teeth in the early stages or repairing damaged saw teeth.
Professional "Metateya" will use a finer “挽切鑢/Hi-kiri file” to finely sharpen the teeth. This file has teeth arranged in three directions on both sides that overlap.It is very fine.
 16:Four finer "Hi-kiri files" in different sizes.
It's just that this file is very thin, and if you are a beginner, it is easy to break it when using it.
There are roughly five types of files available: "毛志鑢/Keshi Yasuri、小挽切鑢/ Sho-Hikiri Yasuri、中挽切鑢/ Chu-Hikiri Yasuri、大挽切鑢/ Dai-Hikiri Yasuri、摺込鑢/Suri-komi Yasuri、油目鑢/Aburame Yasuri."
I usually try to use the "大挽切" to finish the teeth on the saw. As for the "毛志", I have never used it. But my father used the "毛志" when he made a 128-tooth saw mentioned above.
The thinnest saw I have sharpened has 64 teeth (64 teeth on a 30mm length). I was in my 30s at the time and my eyesight was still good, so I guess I could sharpen a saw with 128 teeth (128 teeth on a 30mm length). But my eyesight has started to deteriorate since I got older, and I can't do this job without a magnifying glass. So, try more while you are young.
In addition, the tools used for "Metate" are not very complicated and expensive. Although the finer “挽切鑢/Hi-kiri file” have been discontinued, you can still find them in some tool stores.
———————————————————————————————————
Process of sharpening saw teeth.
※ There is a graphic demonstration of the process at the end of the blogThe first step, whether it is a rip cut or cross cut saw, is to use a plate file perpendicular to the saw body to smooth the uneven teeth.
When using a plate file to level the teeth of a cross-cut saw, the teeth in the middle should be slightly high and the teeth at both ends should be slightly lower; the opposite is true for a rip cut saw, where the teeth at both ends are slightly high and the middle is slightly lower. This is the experience I learned from my father.
※ If you are a beginner, you can ignore the above experience and first ensure that the file and the saw blade are always at a vertical angle. Focus on verticality and straightness. Also, if you use a vise to clamp the saw blade, be sure to make sure the vise is flat to avoid bending the saw blade due to using an uneven vise.
If the saw blade edge produced in this step is not a straight line, or the saw blade edge is tilted (not perpendicular to the saw blade), it will directly affect the accuracy of the subsequent processes. This results in the inability to sharpen the saw teeth with good cutting performance.
The flat surface formed on the edge of the saw blade (top of the teeth) in this step is mainly to provide a reference for sharpening the teeth later. Regardless of whether it is a longitudinal or transverse cutting tooth, the next step of sharpening both sides of each saw tooth is based on eliminating the initial flat surface.
The difference is that when sharpening rip cut teeth, the initial flat surface disappears, indicating the formation of a new sharp tooth "tip", while the sharpening of the cross-cutting teeth requires the use of a file to make the "Uwame" bevel on the saw teeth one by one after sharpening the bevel on both sides of the teeth. (Because in the cross-cutting teeth, "Uwame" also plays a cutting role)
The cross-cutting saw teeth are arranged alternately. Since there is an initial plane formed by the initial plate file as a reference, the sharpening teeth first uniformly sharpen the "shitaba" of the saw teeth on one side, and then sharpen the "seiba" of the saw teeth on the same side until the initial flat surface of the saw teeth on this side disappears; repeat this process on the saw teeth on the other side until the initial flat surface on both sides disappear. In fact, once you get used to it, this repetitive work is not difficult.
※ In the above step, the crosscut tooth need to leave a little top flat surface as the basis for making the "Uwame".
It is more difficult to sharpen the teeth of a rip cut saw because the rip cut saw teeth have only have two sharpening surfaces. After sharpening one side of the teeth evenly, it will become difficult to ensure the uniform sharpening of the teeth on the other side.
It is better to set the teeth before fine-sharpening the teeth.
※ Because the teeth of Japanese hand-made saws are set on the gold bed with a hammer, if the teeth are hammered after sharpening, it may have an adverse effect on the sharpness of the teeth.
It is recommended to use an old file for sharpening the "Uwame" to avoid tearing the top of the teeth due to the new file's teeth being too sharp.
The "Uwame" of the douzuki saw recommends using the finer HI-kiri file.
These are just my methods, every "Metateya" will be different.
Next will enter a conversation session
Questioner 2: When I use a new Suri-komi file, the sharp edge of the file sometimes gets stuck between the teeth, making it difficult to use. In this case, should I sharpen the sharp edge to make it blunter?
Tsuchida: There is no special sharpening required, but the amount of pressure you apply to the file is often a matter of feel. However, my father reminded me not to underestimate the first step of using a plate file to level the saw teeth. Although it seems a simple task, not many people can do it well.
Questioner 2: Is it harder to "metate" when the teeth are smaller?
Tsuchida: I found that it is more difficult to “metate” the large teeth, or it is easier to find problems. It is easy to find that the large teeth are not done well, and it is difficult to find that the small teeth are not done well. It is said that just by looking at the large sawtooth after "metate", you can know the true strength of this “Metateya".
※ In addition to this speech, there is also a video. I will add English subtitles to the video when I have time.
———————————————————————————————————
The Japanese saw tooth sharpening process drawn and illustrated by me based on the information above.
 “Edome” for cross-cut (above); rip cutting teeth (below). Assuming they need to be sharpened.


Step 1: Use a plate file to lower the non-sharp teeth to get the saw teeth shown in the picture above. After this step, the top of the tooth will have a tiny flat surface shown in yellow in the picture.


Things to note when sharpening rip cut saw teeth: When sharpening the rip cut saw teeth, be careful to keep the file perpendicular to the saw blade during the sharpening process (From the top view, the file's movement path is always perpendicular to the blade as shown in the figure below). This can be determined by observing whether the top plane of the sawtooth is square. But this will quickly tire your eyes. If you need to use a finer file to sharpen the teeth later, remember to leave a little top flat surface during the rough sharpening stage. The remaining top flat surface is used as a reference for the fine sharpening in the next step.
Note that it is best to set the teeth first and then do fine sharpening.

