
Chisel Handle
Factors affecting the orientation of radial and tangential sections when installing oak chisel handles — Wood shear strength parallel to the grain
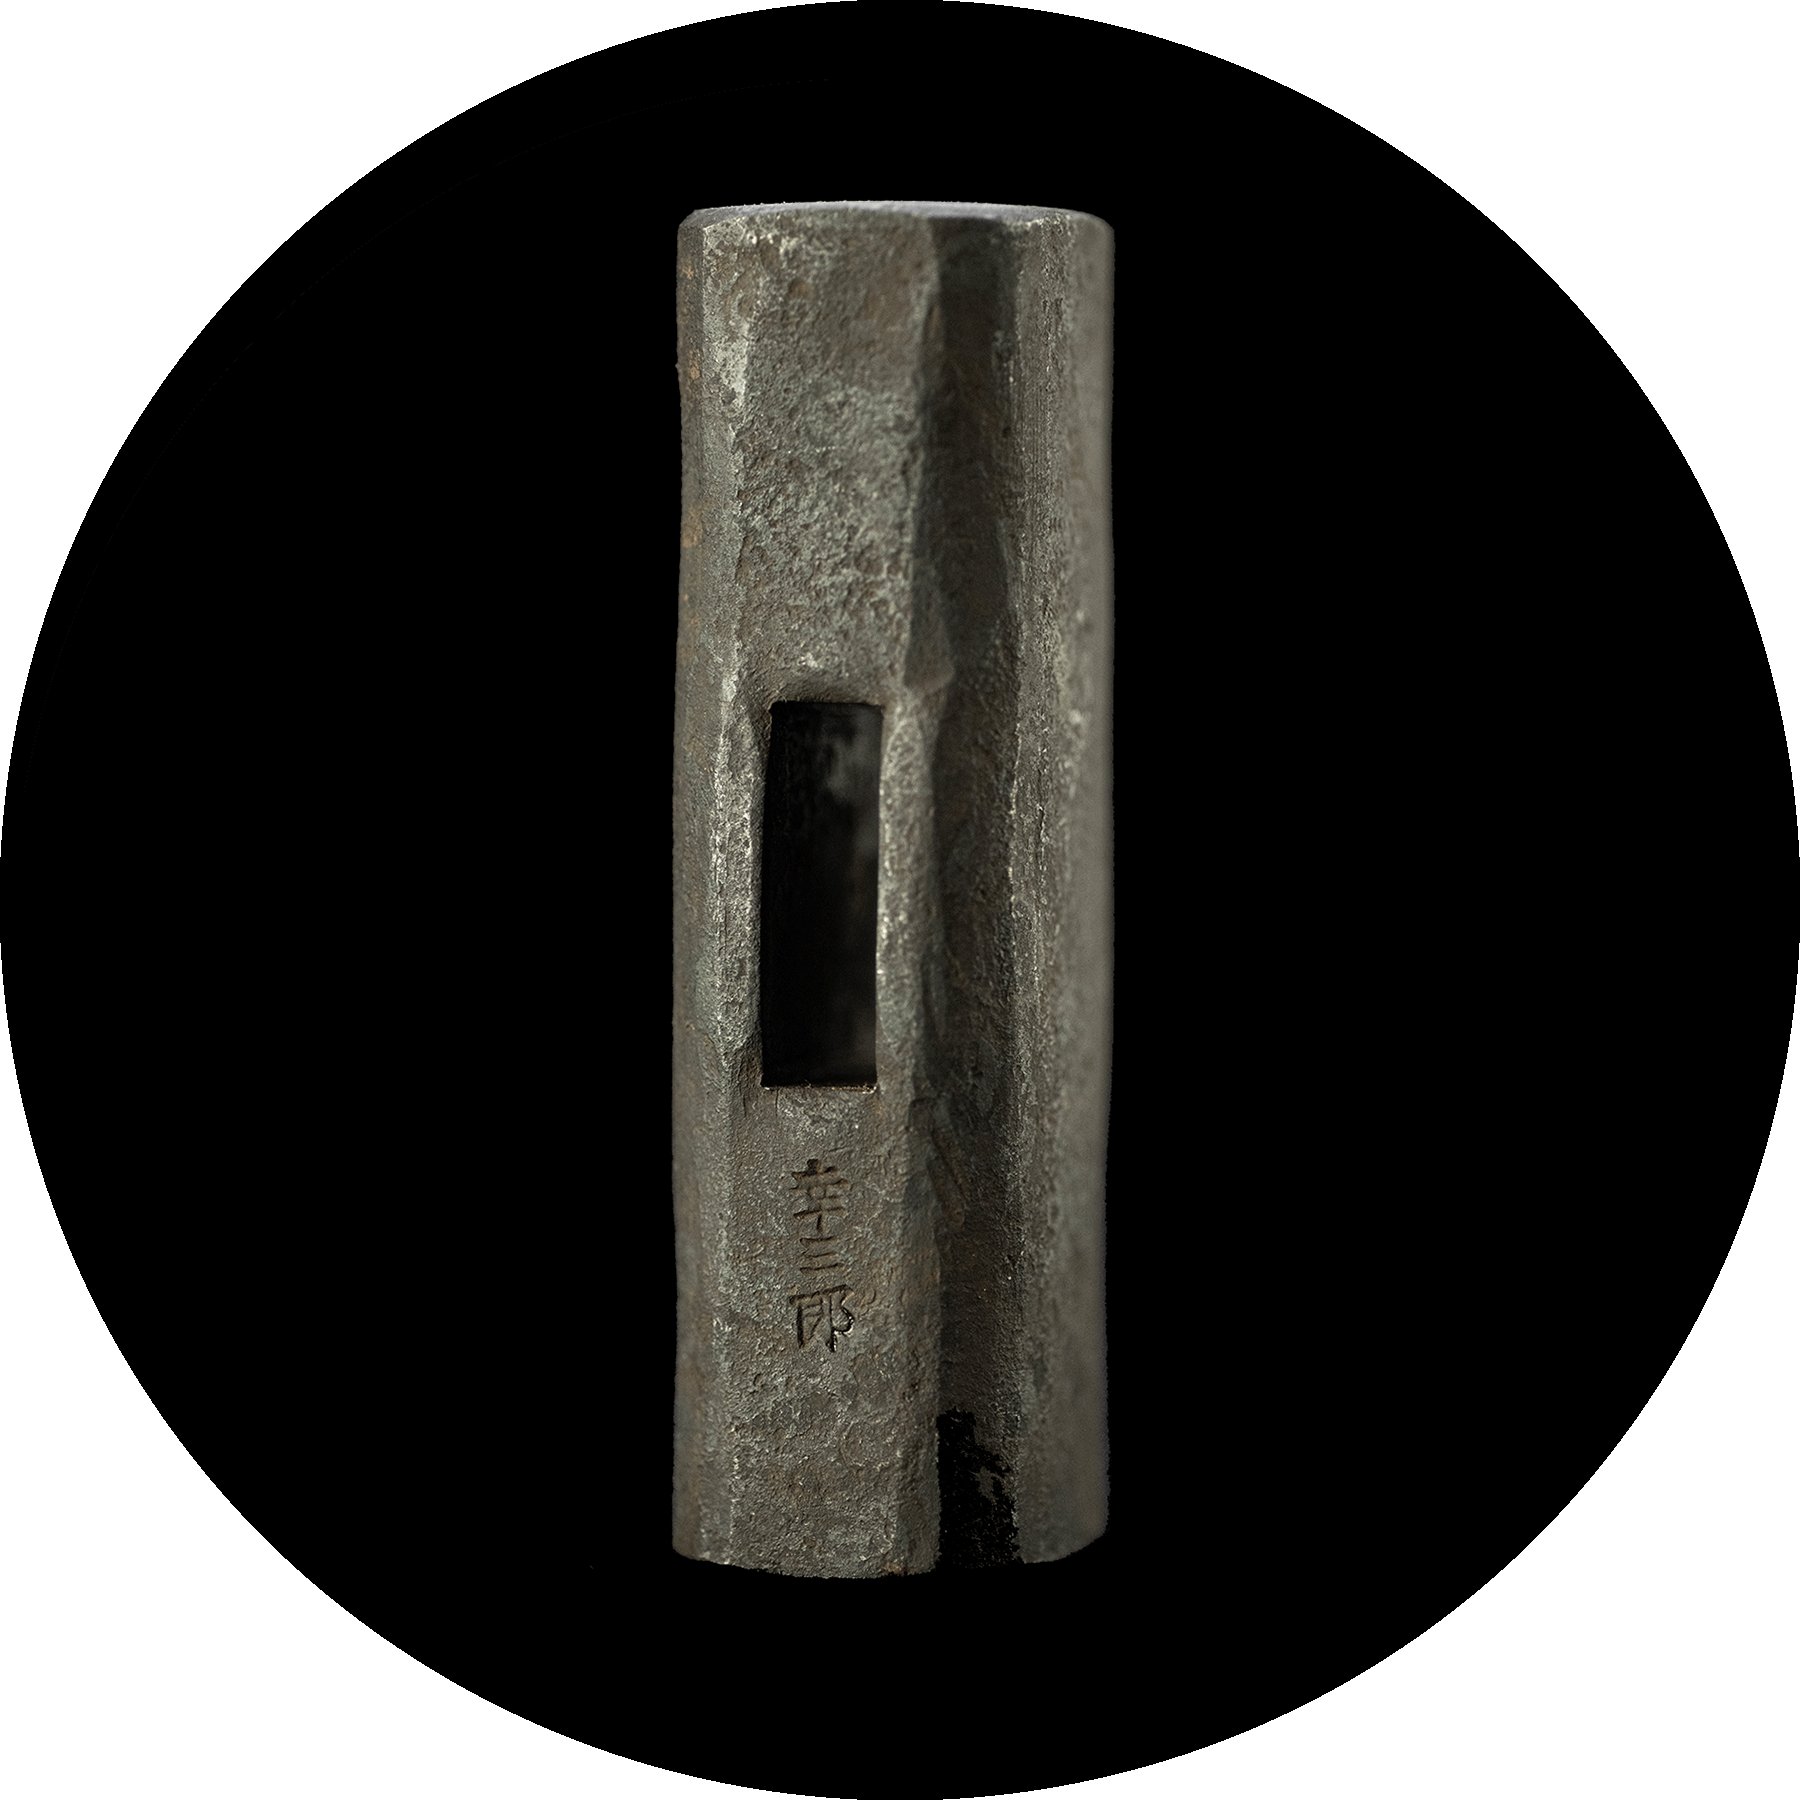
Last month I had Mr. Tsuchida Noboru install a few chisel handles for me. The handle is made of Japanese white oak. Because the services and tools provided by Tsuchida's store are only for professional users, the store does not offer fancy wooden handles. The most important reason why I ask Mr. Tsuchida to install the wooden handle for me was not the material of the wooden handle, but the secrets about the chisel handle that Mr. Tsuchida Noboru (and his father) got from a professional Anaya daiku (Japanese hole maker).

Part of Anaya daiku’s chisel secrets is about setting up the chisel handles. The handles that Mr. Tsuchida installed for my chisels were not set. The Tsuchida store offers a service for installing chisel handles, but not for setting chisel handles.
For chisel wood handle settings, please refer to the following links and books:
Mr. Covington's blog:https://covingtonandsons.com/2019/05/03/setting-up-japanese-chisels/
The chisel setting method demonstrated by Mr. Tsuchida Noboru is available in this book. ——『Complete Guide to Chisels 鑿大全』 P86~96
Another secret from Anaya Daiku is the orientation of the radial and tangential sections when installing oak chisel handles. The Anaya daiku’s whole day's work is just to use a hammer weighing more than 700g to hit the Tataki chisel to make mortise holes. The mortise holes in the building structure are deeper, so they like to keep the overall length of the tataki chisel at about 30cm for work. If the blade becomes shorter due to wear, they replace it with a longer handle; if the handle wears out, they replace it with a new one.
There are two types of traditional tataki nomi used by Anaya daiku: Hori-nomi and Sarai-nomi. Hori-nomi is used to dig mortise hole. Sarai-nomi is used for fine processing of the side (long side) of the mortise hole and the flat surfaces of other mortise and tenon structures.

Anaya daiku found that the oka handles pictured below are less to wear out or crack under long hours at high intensity work.

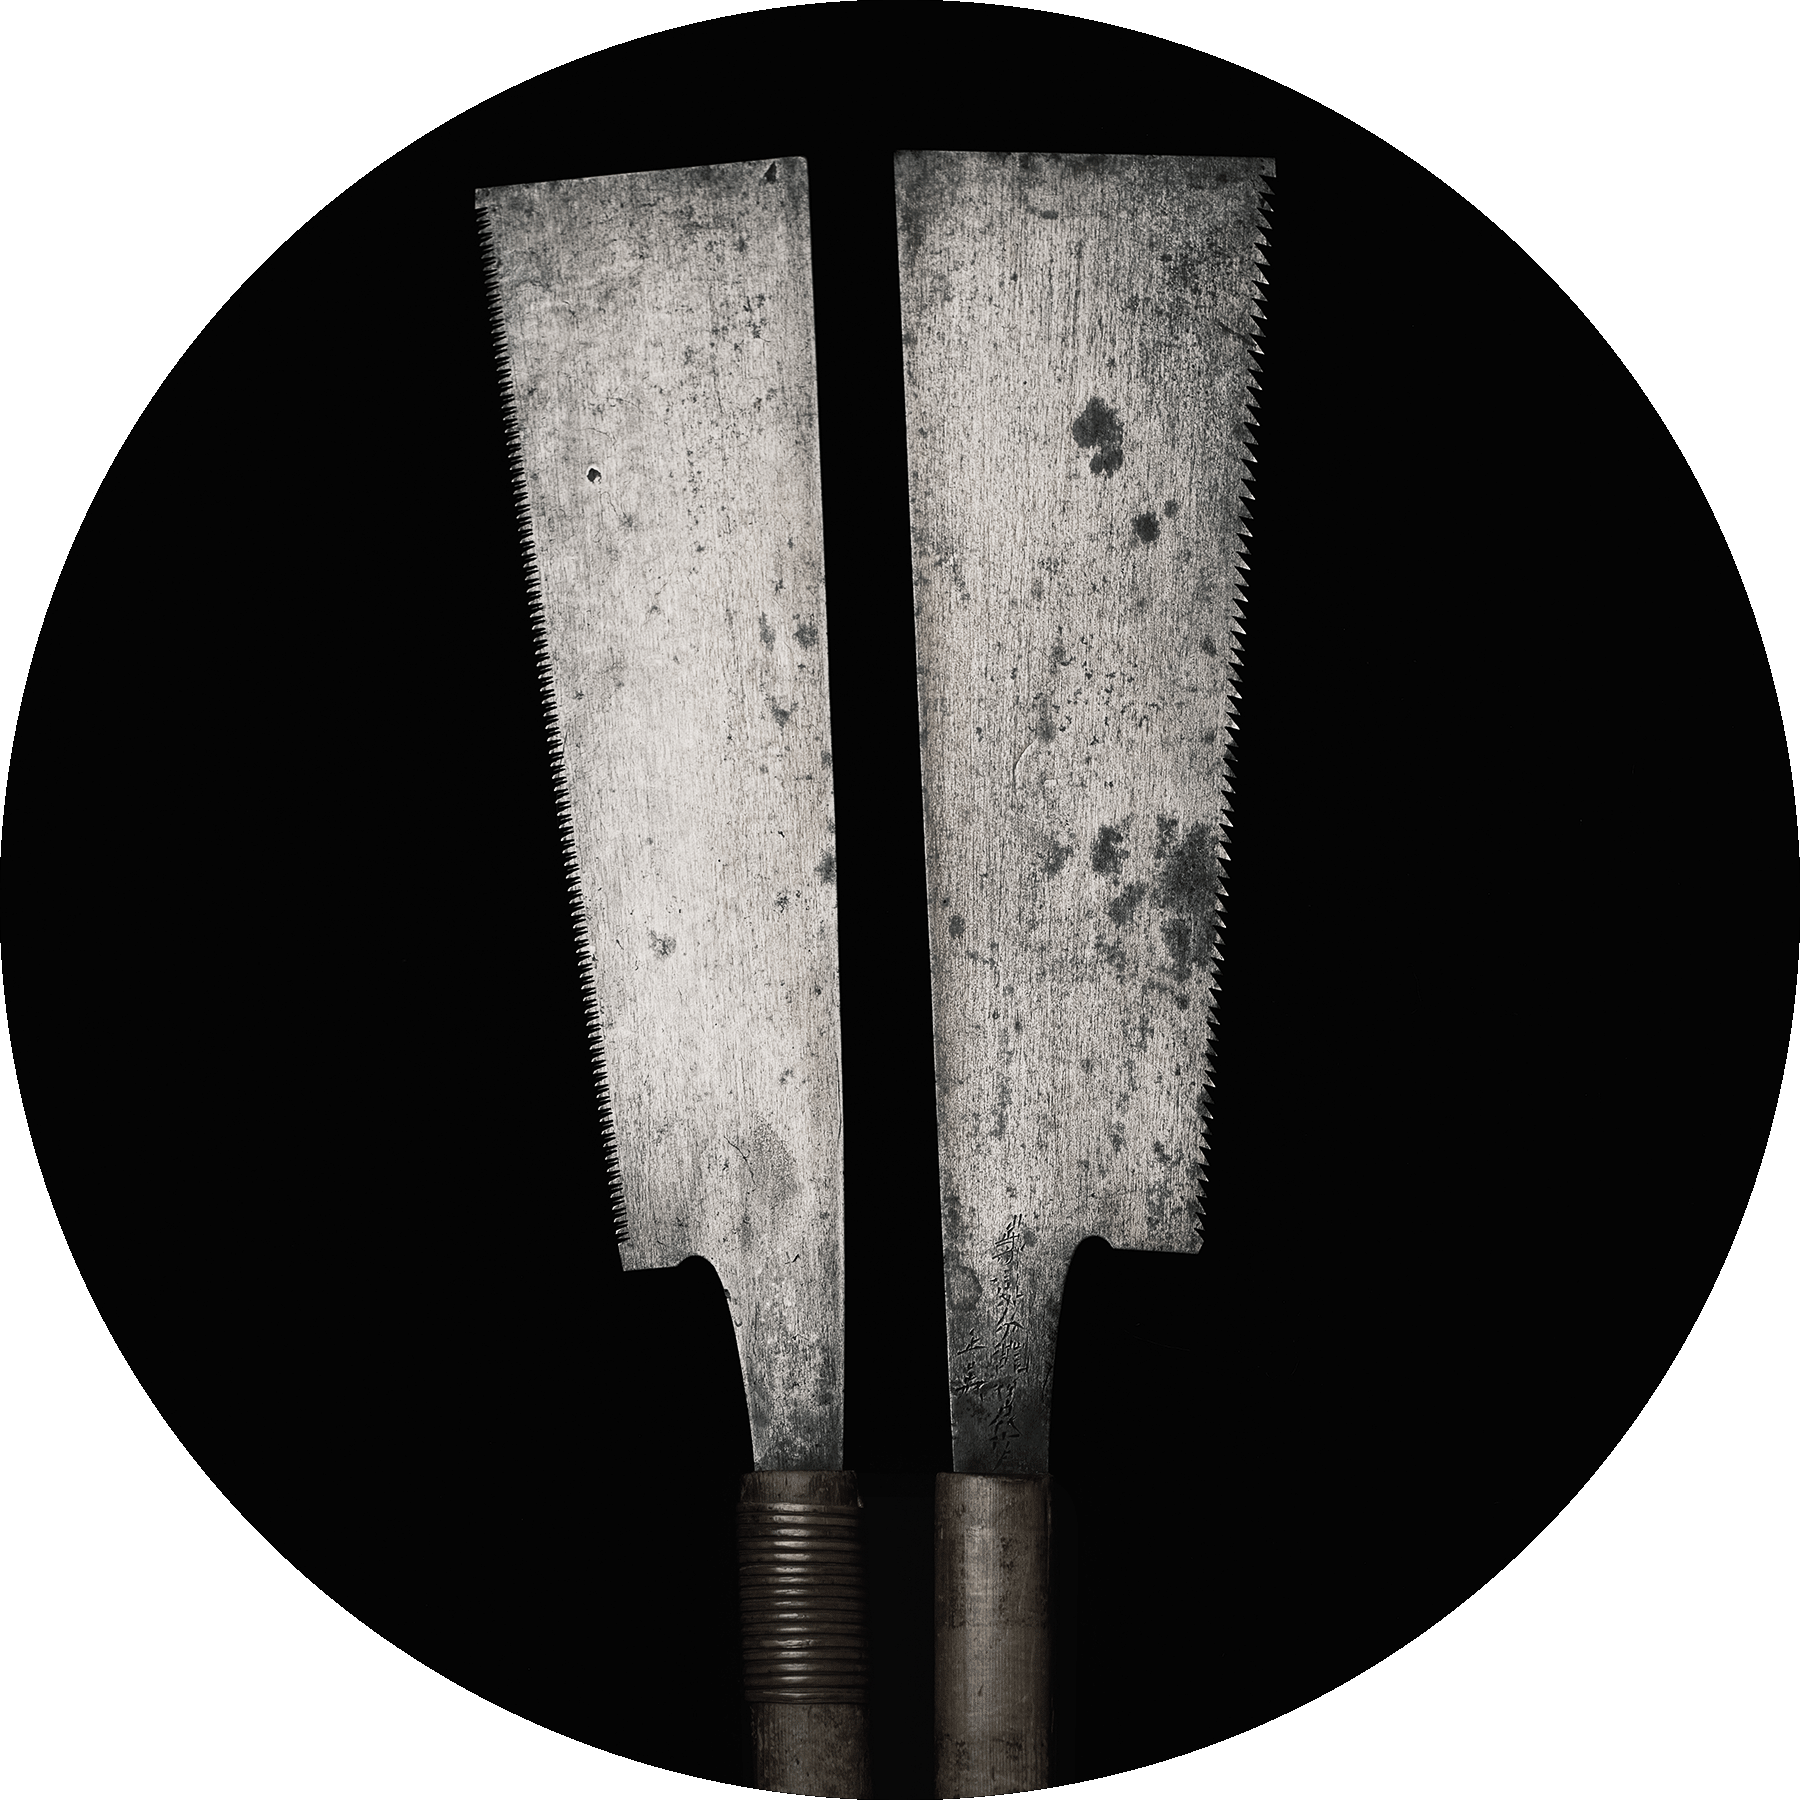
Hori-nomi: the tangential sections of the oak is oriented in the same direction as the front and back of the chisel.
Sarai-nomi: the radial sections of the oak is oriented in the same direction as the front and back of the chisel.
Since the medullary ray on the end of the oak is more eye-catching, it is easier to distinguish by using the medullary ray.
Lay the chisel flat, right side up.
Hori-nomi: the medullary ray should be perpendicular to the ground.
Sarai-nomi: the medullary ray should be parallel to the ground.
The light-colored lines in the picture below are the medullary ray of white oak. The lines perpendicular to the light-colored medullary rays are the annual rings.

The most important part is over. In the following part, I will try to explain the principle
¨¨¨¨¨¨¨¨¨¨¨¨¨¨¨¨¨¨¨¨¨¨¨¨¨¨¨
A skilled carpenter demonstrates how to use some tataki chisels to make a mortise hole in this video(at 0:17~2:26):https://www.youtube.com/watch?v=vqleM9tdREU
The Anaya daiku is faster and uses a heavier hammer. The hammer in the video is about 450g. It can be seen from the video that the chisel is not always vertical when the carpenter hammers the top of the wooden handle of the chisel; many of the hammering occurs when the chisel is tilted as shown in the two pictures below.


When hammering while the chisel is tilted, even a skilled Anaya daiku will have difficulty ensuring that the striking surface of the hammer hits the center of the chisel handle. In most cases, the hammer hits the edge of the top of the wooden handle as shown below.

Hitting the top edge of a wooden handle with a hammer will produce a shear parallel along the grain of the wooden handle.
Shear forces parallel to the wood grain can be divided into two types:
① Shear force on the radial section. Pictured below left.
② Shear force on the tangential section. Pictured below right.

The shear strength of the tangential section of most wood is greater than that of the radial section. Experienced and skilled Ming-style furniture craftsmen usually make tenons and shoulders on the tangential section of the wood. Especially in the main load-bearing structure, it improves the stability of the furniture structure. As shown on the right side of the picture below.

But the opposite is true for oak. Because the medullary ray of oak is well developed, the shear strength of the radial section of oak is greater than that of the tangential section.
In addition, according to reliable information, the cracking of the Japanese oak end surface is along the medullary ray. The following two pictures show the tops of two chisel handles that have been used for decades. Although there is no cracking, the medullary ray is obviously lower than the end plane.


But Hori nomi and Sarai nomi with chisel handles mounted using anaya daiku's secrets can effectively reduce cracking along the medullary ray even when the edge is hammered.
The red circle in the picture below is the area where the top of the wooden handle of Hori nomi and Sarai nomi is easily hit when working at an angle. It can be seen that the area where the top edge of the handle of the Hori nomi and Sarai nomi was struck is perpendicular to the medullary ray.
In this way, even if the hammer inevitably hits the edge of the top of the wooden handle, it can reduce the possibility of cracking along the pith line of the top of the wooden handle to a certain extent.

Fortunately, the shear forces do not usually cause the top to crack due to the metal ring on the top of the chisel handle, but I have seen handles that have cracked all along the grain, using very hard and brittle dark wood. This is why professional carpenters in Japan prefer to use tougher woods such as white oak to make chisel handles.
Although the top of the oak chisel handle is protected by a metal ring and is not easily cracked by hammers, the shear force from striking the top edge of the wood handle will still cause shallow cracks in the wood at the edge. As the hammer continues to strike, the splintered wood at the top edge of the handle will compress, splinter, and fall off as shown below.
